Introduction
I’m Quinto, and my love for cooking began in my grandmother’s cozy kitchen a place where each dish carried a story. In this recipe, we’re making California Date and Nut Bars, a wholesome snack inspired by my childhood summers . They’re chewy, naturally sweet, and packed with energy perfect for an afternoon pick-me-up. You’ll learn how to blend simple ingredients into a satisfying bar that feels like sunshine in every bite. Whether you’re into healthy snack bars or gluten-free treats, this guide will walk you through every step with heart and ease.
A Taste of Home with California Date and Nut Bars
Bringing the California sunshine into your snack
I still remember Grandma stirring dates and nuts over low heat, filling the kitchen with that warm, comforting aroma. That memory inspired me to recreate those chewy treats, and so the idea for California Date and Nut Bars was born. These bars capture sunshine vibes with just a few wholesome ingredients and the taste transports me back every time I take a bite.
A childhood memory sweetened with dates
Funny how a simple date can spark a memory. For me, dates meant family gatherings and Grandma’s gentle encouragement to “have another.” We’d pit them together and laugh as they stuck to our fingers. Now, when I make these bars, I can almost hear her voice and feel the love she poured into every recipe.
Why dates and nuts make a perfect pairing
Dates bring natural caramel-like sweetness and chewy texture, while nuts add crunch and healthy fats. Together, they create a balanced snack that fuels your day without refined sugar. If you love other wholesome treats, check out my Healthy Almond Butter Energy Bites or explore nut-based desserts in the Healthy Baking category for more inspiration.
Ingredients for California Date and Nut Bars
When you start gathering ingredients for California Date and Nut Bars, you’ll see how simple, wholesome they are. These bars need just a handful of items and nearly all are pantry staples.
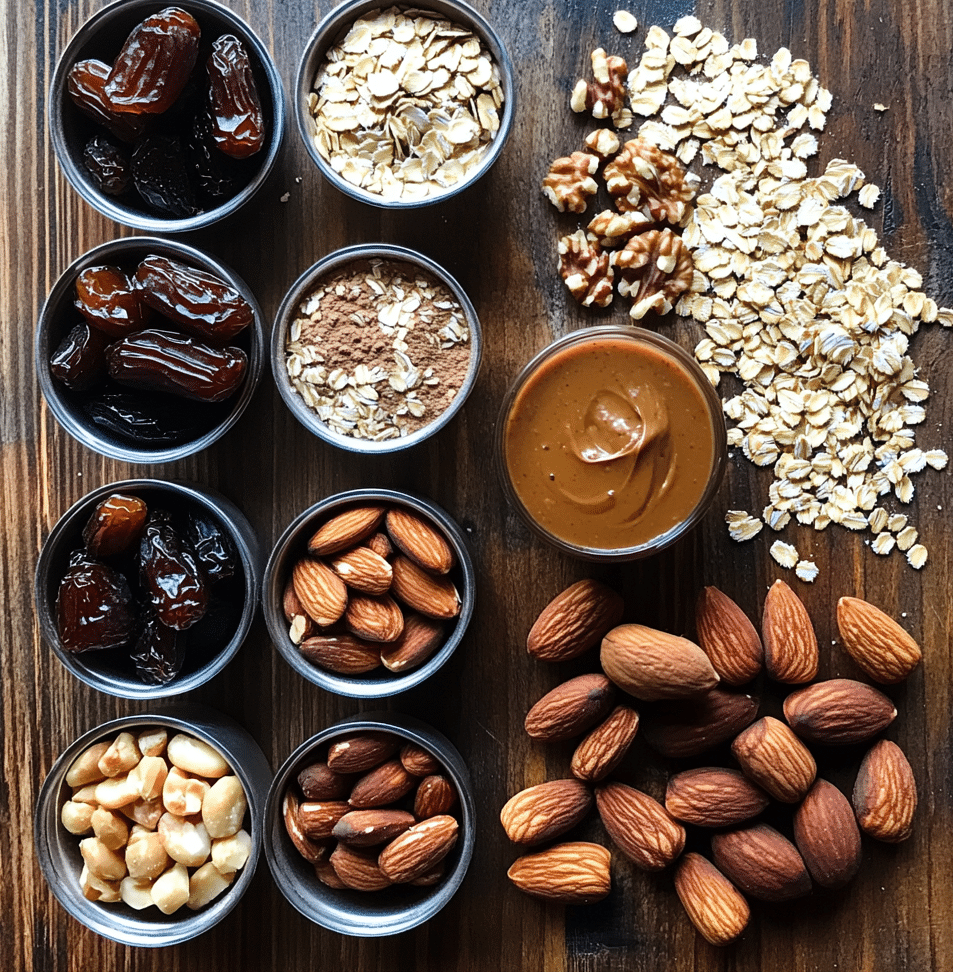
Core ingredients (dates, nuts, binders)
- Medjool dates (1½ cups, pitted): These give the bars their signature chewiness and natural sweetness.
- Assorted nuts (1 cup total; almonds, walnuts, pecans): They add crunch, nutrients, and texture.
- Rolled oats (½ cup, use certified gluten-free if needed): Oats bind everything nicely and boost fiber.
- Nut butter (¼ cup almond or cashew): This helps hold the mixture together and adds creaminess.
- A pinch of salt and cinnamon: These simple touches balance flavor and round out the taste.
Optional add-ins and substitutions
Explore various combinations and boost flavor or texture:
| Add-in/Substitution | What It Does |
|---|---|
| Dried fruits (cranberries, apricots) | Adds sweetness and chewiness |
| Seeds (chia, flax, pumpkin) | Increases fiber and protein |
| Protein powder | Makes bars more filling and post-workout ready |
| Chocolate chips or cocoa nibs | Adds sweetness or subtle crunch |
Step‑by‑Step: How to Make California Date and Nut Bars
Let’s roll up our sleeves and bring those ingredients to life making California Date and Nut Bars is a straightforward and satisfying process that transforms simple components into something wonderfully chewy, nutty, and nourishing.
Prepping and blending ingredients
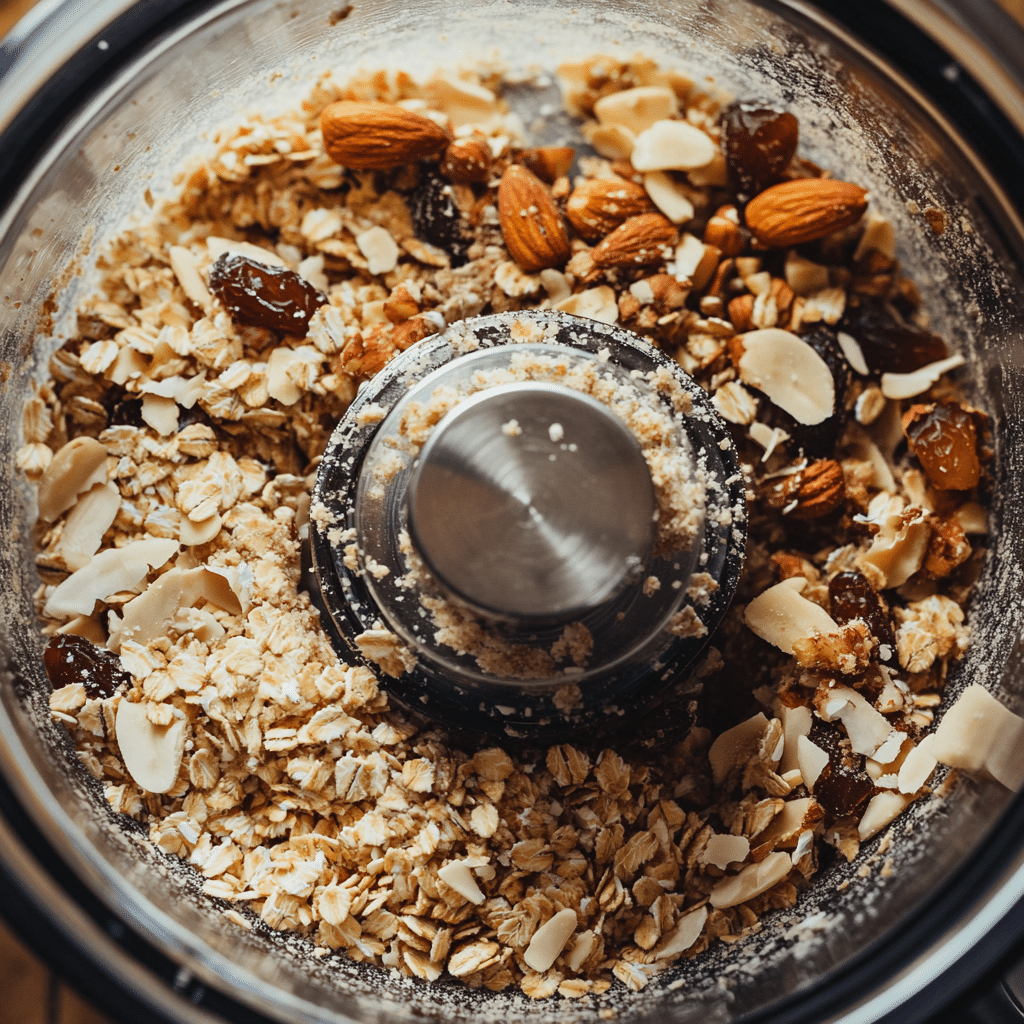
Begin by lining an 8×8-inch baking pan with parchment paper. This will help with both forming and removing the bars cleanly after baking. Pit your Medjool dates if they’re not already, then roughly chop them along with your nuts.
Add the dates, rolled oats, chopped nuts, salt, and cinnamon to a food processor. Pulse several times until the mixture becomes coarse and sticky. You’re looking for a chunky dough that holds together when pressed but still shows visible bits of nuts and oats.
Next, spoon in the nut butter and pulse a few more times. The mixture should now come together more cohesively. If it feels dry and crumbly, add a teaspoon of water or a little extra nut butter. If it’s too sticky or soft, toss in another small handful of oats to firm it up.
Test it with your fingers if a small portion presses into a ball and holds, you’re ready to shape. This is the texture that gives the bars their trademark chew and satisfying bite.
Baking and cutting tips
Scoop the mixture into the prepared pan and press it down evenly with the back of a spoon or your hands. You want a compact, smooth surface about half an inch thick. Press firmly to avoid crumbling later.
Bake at 350°F (175°C) for about 12–15 minutes. You’re not cooking so much as setting the bars watch for lightly browned edges and a faint toasted aroma. That’s your cue they’re ready.
Remove the pan from the oven and let it cool on the counter. Once at room temperature, transfer to the refrigerator for 15–20 minutes. Chilling helps solidify the bars and makes them much easier to slice cleanly.
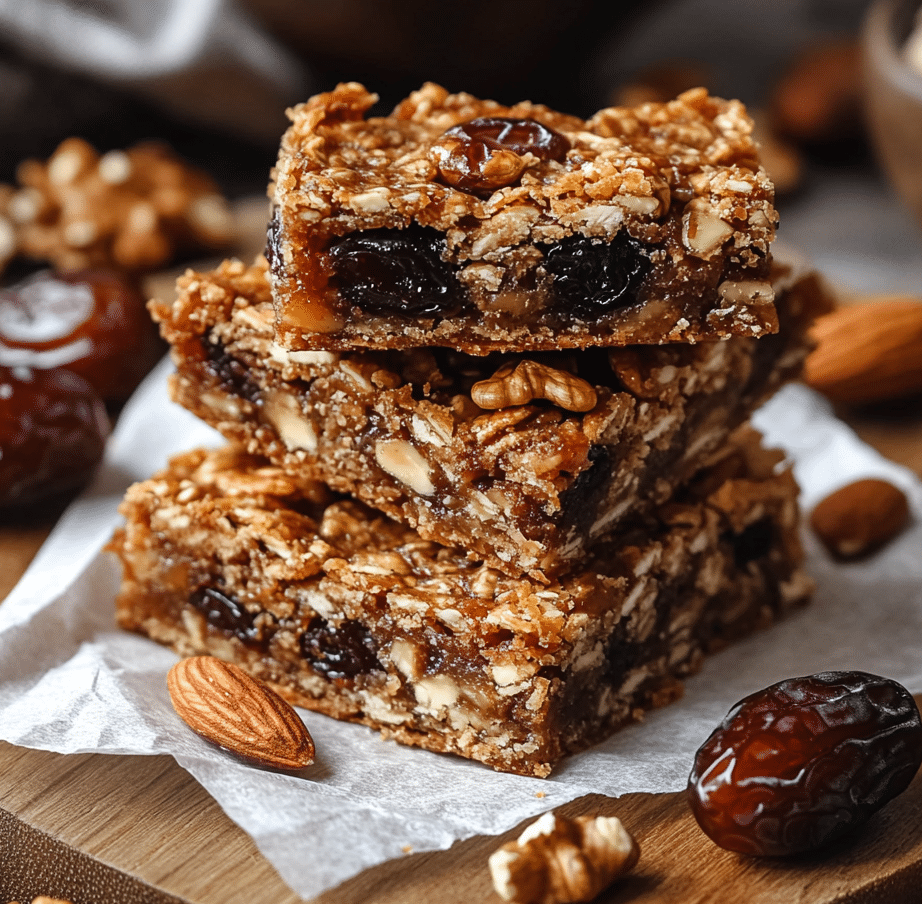
Lift the bars from the pan using the parchment paper, place them on a cutting board, and use a sharp knife to cut them into 12 even squares or rectangles. Wipe the blade between slices for tidy results.
Baking tip: For those who love a sweet-salty contrast, sprinkle a pinch of flaky sea salt on top just after baking. It enhances the nutty flavors and adds a pleasing crunch.
With your batch cooling and ready for slicing, you’re now just a few steps from enjoying a homemade snack that balances indulgence and nourishment. In the next part, we’ll cover variations to suit different diets and how to store your bars for lasting freshness.
Variations, Storage, and FAQs
Let’s personalize your batch of California Date and Nut Bars and make sure you can keep them fresh for snacking anytime. One of the great things about this recipe is how adaptable it is. Whether you need a gluten‑free option, want a vegan twist, or prefer a nut‑free version, there’s a variation that will fit right into your lifestyle.
Can California Date and Nut Bars be made gluten‑free or vegan?
Absolutely! These bars are naturally flexible and easy to adapt. If you’re avoiding gluten, be sure to use certified gluten‑free rolled oats most commercial oats are processed in facilities that handle wheat, so it’s worth double-checking labels. For those following a vegan diet, choose a plant-based nut butter like almond, cashew, or sunflower seed butter. These add richness without compromising texture or flavor.
Want a nut-free version? Swap out the nuts entirely for a mix of pumpkin seeds, sunflower seeds, and shredded coconut. The result is just as satisfying, with a slightly different flavor and crunch. I once helped a baking class of students customize these bars for allergies, and their creativity turned out some unforgettable variations. A pinch of cardamom, a handful of raisins, or even a swirl of tahini can take this basic recipe in fun new directions.
These tweaks don’t just cater to different diets they also bring out new flavors and textures to keep things interesting with every batch.
How long do California Date and Nut Bars stay fresh and how to store them?
One of the best parts of making California Date and Nut Bars is that they store beautifully. Once the bars are completely cool and sliced, keep them in an airtight container at room temperature for 5 to 7 days. They’ll hold their shape and flavor nicely, making them ideal for grab-and-go breakfasts or quick snack breaks.
Want to extend their life a little longer? Place them in the fridge properly sealed and they’ll stay fresh for up to two to three weeks. Refrigeration can also enhance the chewiness and make the flavors more concentrated.
For longer-term storage, these bars are freezer-friendly. Wrap each bar individually or layer them between parchment sheets in a zip-top bag. They’ll last up to three months frozen. When you’re ready to eat, let them thaw on the counter for 15 minutes or microwave them for about 10–15 seconds for a soft, warm texture.
Whether you’re baking a batch to share or stashing some for busy days, these bars are always ready to go when you need a healthy, satisfying snack. With their long shelf life and customizable ingredients, they’re one of the most practical snacks to keep on hand.
for more recipes follow our facebook page
Conclusion
Making California Date and Nut Bars offers more than a snack it’s a journey back to my grandmother’s kitchen and into your home. These bars are simple, adaptable, and brimming with flavor. Whether you’re grabbing one before work, packing them for a hike, or sharing them with loved ones, they fit right into your day. Try the recipe, let me know which variation becomes your favorite, and explore more wholesome snacks in the Healthy Baking section. Pull up a chair there’s always another story cooking!
FAQS
1. What ingredients are needed for California Date and Nut Bars?
You’ll need Medjool dates, a mix of nuts (like almonds and walnuts), rolled oats, nut butter, plus a pinch of salt and cinnamon. Optional add-ins include seeds, dried fruit, or chocolate chips.
2. How do you make California Date and Nut Bars?
Blend dates, nuts, oats, and spices into a coarse mixture. Add nut butter, process until sticky, press into a lined pan, bake at 350°F for 12–15 minutes, then cool and slice.
3. Can California Date and Nut Bars be made gluten‑free or vegan?
Yes use certified gluten‑free oats and plant-based or seed butter. Substitute nuts with seeds for a nut-free version.
4. How long do California Date and Nut Bars stay fresh and how should they be stored?
Store at room temperature for 5–7 days in an airtight container, refrigerate for 2–3 weeks, or freeze up to 3 months.

1 thought on “California Date and Nut Bars – Wholesome & Irresistible Snack”